
How to vibe-code a real product in 5 hours
Draft product requirements with LLM. Generate a rapid prototype in Google AI Studio. Use Cursor to build the core logic. Connect Supabase for your database. Deploy the final app on Vercel. Have fun.

Every time I vibe-code, it feels like a fever dream. I type, I click, and suddenly things work. I honestly don’t know how I manage it sometimes. But I get exactly what I want in the end. It’s a highly satisfying feeling. I decided to take screenshots at every step this time. I wanted to remember my exact process. So, I’ll share exactly how I shipped a recent project in this article. I’ll take you from a raw idea to a live production environment.
Before we dive into the weeds, I want to show you the end result right away. You can actually check out the live app we’re going to build. It’s called Stanza. I’ll give you more details about why I built it in a minute, but feel free to click the link below and take a look around.
This specific project took me exactly five hours. I went from a lingering idea to a live website. Real people can actually use it right now. I’ve built apps this way nine or ten times before. If this is your first time, it’ll probably take you longer than five hours. That’s completely normal. Practice makes perfect. You just need to dive in and start building.
Let’s talk about the actual cost. Building this cost me about €60 on Cursor. I also used my existing Gemini Pro subscription. I relied entirely on the free tiers for everything else. This means I have strict daily limits. My database capacity, email sends, and new user registrations are capped. I don’t expect massive traffic anyway. I built this purely for the thrill of vibe-coding. I’m going to break down every single detail for you.
Here’s what we’ll cover in this article. Think of it as our blueprint for the next few minutes. First, we’ll look at the core idea and why I actually built this app. Then, I’ll outline my exact workflow and the specific stack of tools I used. I’ll also share my golden rules and principles for building with AI. After that, we’ll walk through the actual execution step by step. I’ll take you from the very first prompt all the way to the final deployment. Finally, we’ll dive into the messy middle. I’ll expose the specific errors I hit and show you exactly how I hacked my way out of them.
Grab your coffee, pull up a chair, and let’s build this thing together!
Explore the final product: Stanza
Let me tell you where the idea for this app actually came from. I was chatting in a WhatsApp group a while back. Someone asked for a book recommendation for a “man in deconstruction.” I smiled at the controversial phrasing, but I suggested “Of Mice and Men.” It’s an incredibly short but profoundly moving book. I read it at different stages of my life, and I always understand something different each time. Suddenly, the group started challenging me. They argued it was the absolute worst book for that specific topic. I didn’t want to debate on WhatsApp. It always turns into a chaotic, unreadable mess. But I was frustrated. I really wanted an intellectual boxing ring to discuss it properly.
That frustration sparked a realization. I’ve always wanted a place to talk about books freely. But I wanted it to be ephemeral. It should feel like a pop-up book club. You drop in, share a deep thought, and then you leave. I don’t like how internet opinions live forever. Our views on books change as we age and experience new things. Art has superficial layers at first glance. But deeper, symbolic layers unlock at different phases of your life. I needed a clean, minimalist interface for temporary thoughts.
I decided to build it myself, and I called it Stanza. The name fits perfectly for a space dedicated to words and structure. I wanted the reading experience to be completely frictionless. People can read ideas without even creating an account. It looks a bit like Hacker News. Users can upvote a post to push it up the rankings. You only need to log in if you want to publish a post or write a comment. I kept the features basic for this first version. Simple rules prevent complex bugs.
Since posts only last for 24 hours (and that I’m the only user), the site might look pretty empty if you visit it right now. I took some screenshots to show you the flow and what it looks like with data.
When you first arrive, you’re greeted by a very clean, quiet interface. It literally says “Silence in the library” to set the mood. It invites you to be the first to start a conversation.

If you want to join the conversation, you just enter your email. We use a simple modal for this step. There are absolutely no passwords to remember here.

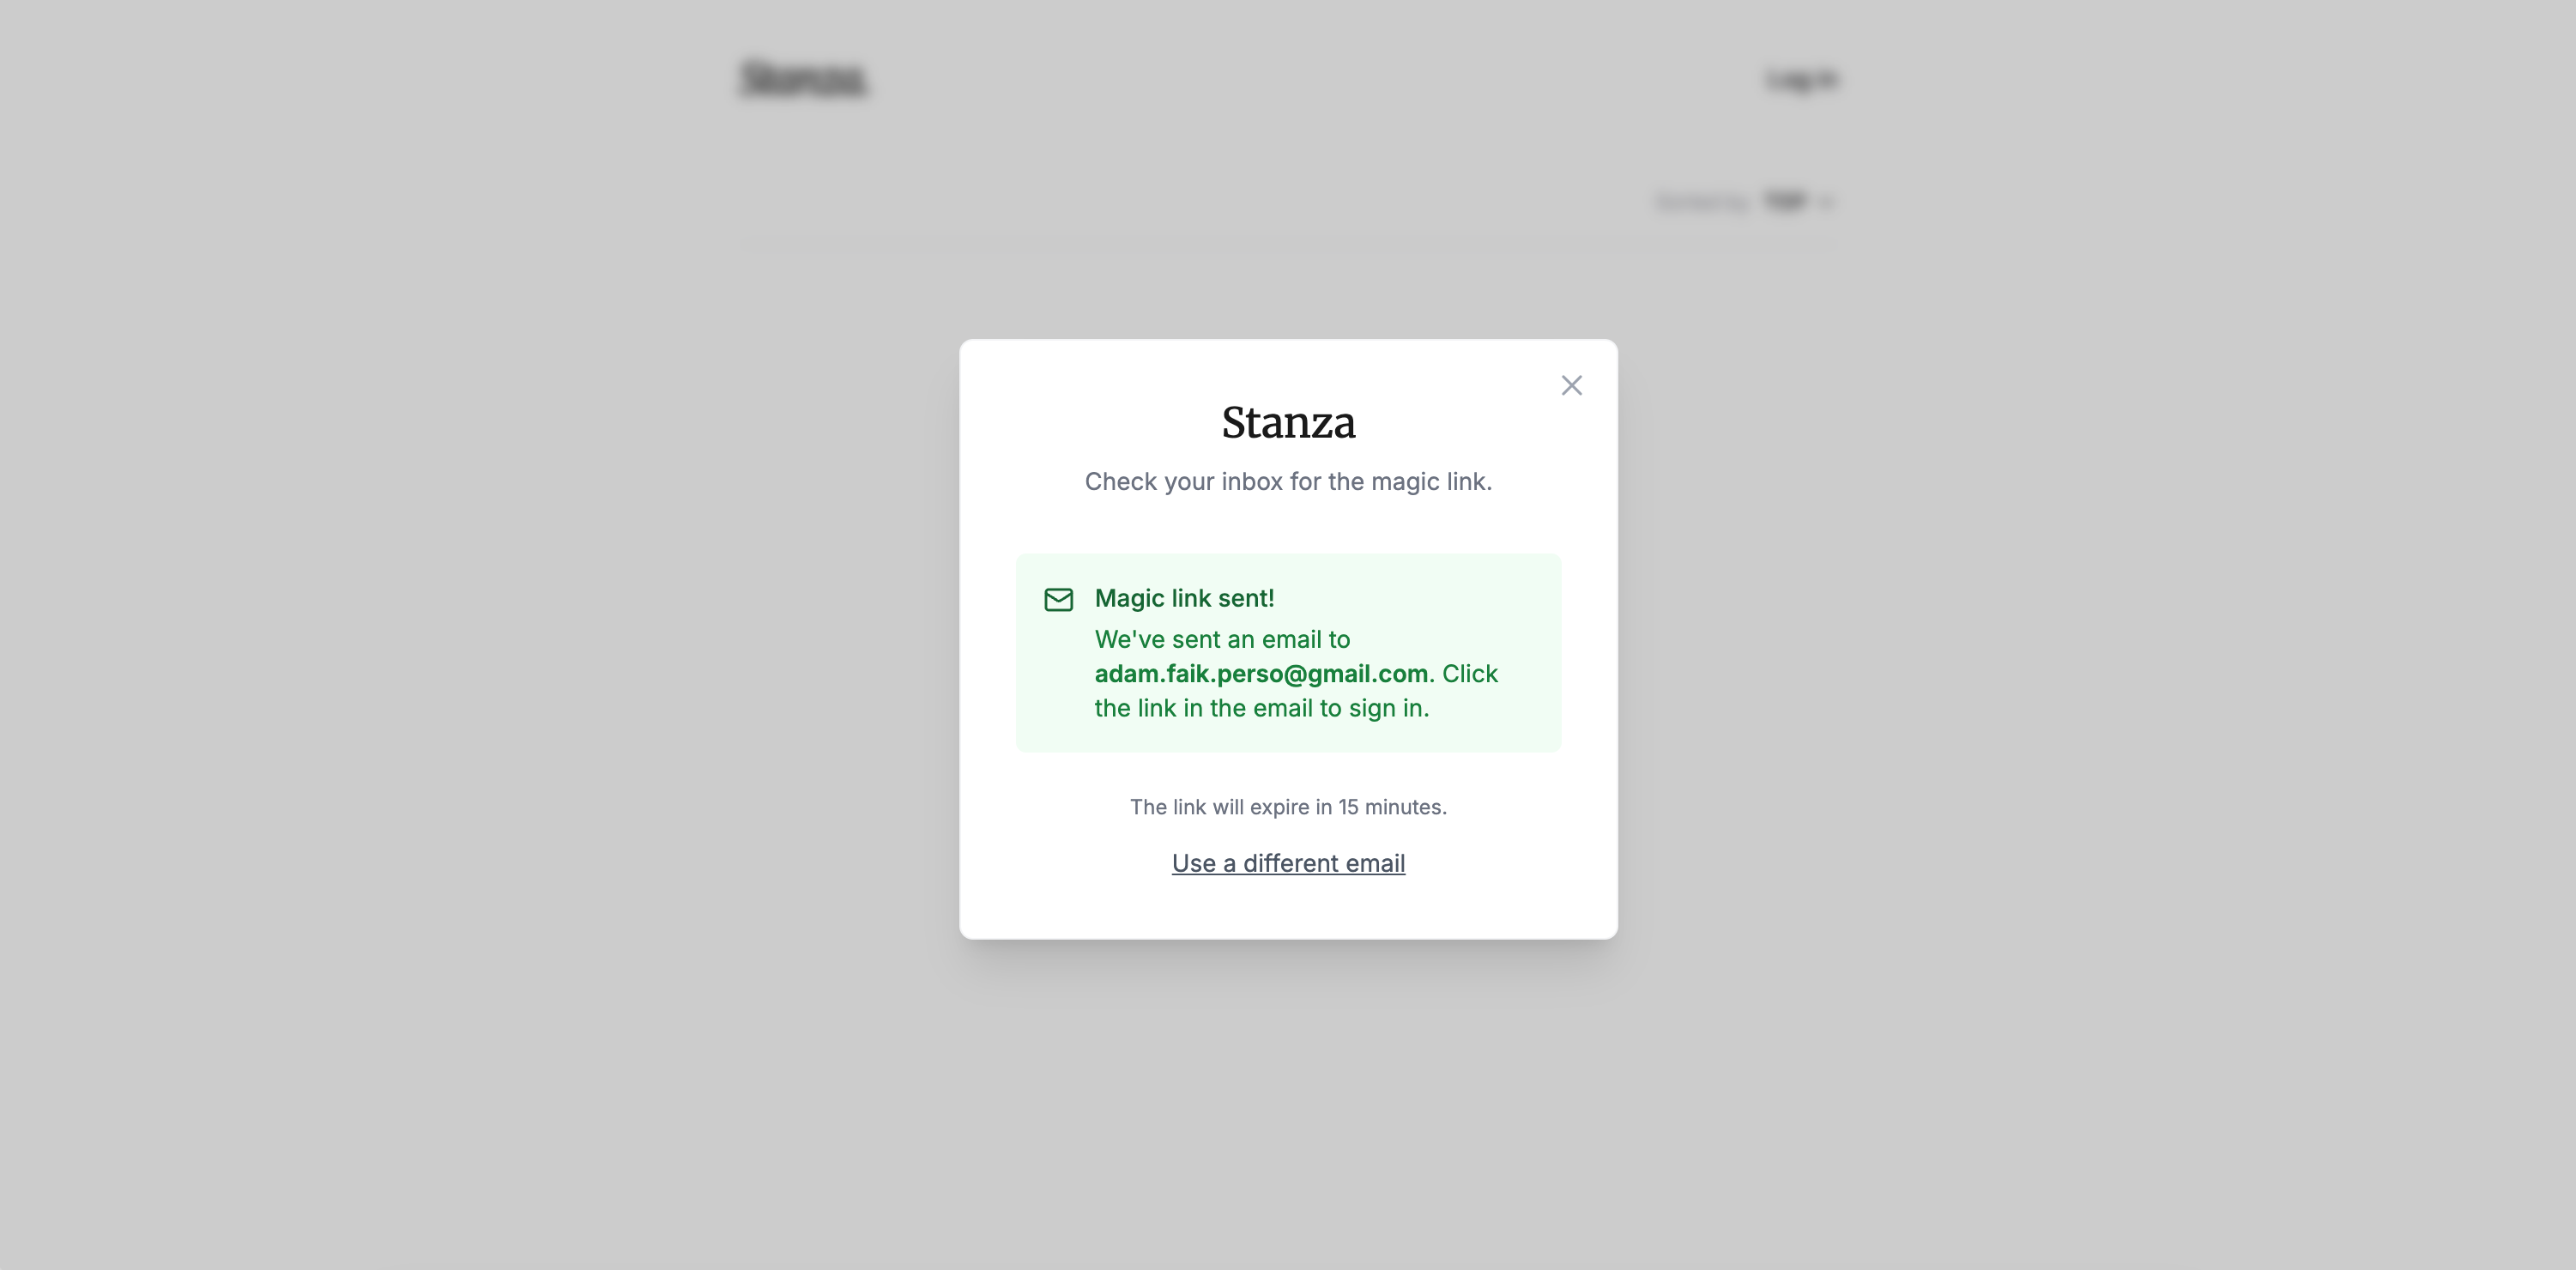
The app then sends a magic link straight to your inbox. A neat little green confirmation box pops up to let you know it worked. It’s fast, secure, and totally frictionless.
Once you click the magic link in your email, you just pick a username. The modal guides you through this final onboarding step. You’re instantly ready to start sharing your thoughts.

Now you’re officially logged in. The empty state remains, but a black “+ New Post” button appears at the top right. It’s time to step into the ring and share an idea.

The writing interface is completely distraction-free. You just give your thought a bold title and start typing your content. The minimalist design keeps you entirely focused on the words.

You can even attach a single image to your post if you want. It adds a great visual layer to the text.

Once you hit publish, your thought goes live on the main feed. A small timer shows up, and the clock immediately starts ticking down from 24 hours. It creates a sense of urgency.

As more people post, the feed becomes a dynamic list of ideas. You can see different posts stacked together, complete with upvote counters. It’s a fleeting snapshot of what people are reading and thinking about right now.

You should try it out yourself. Go create an account and share a book that changed your perspective. I spent some time iterating on this interface to make it feel just right. I hope you enjoy the vibe.
Review the workflow and the tools
Let’s talk about the overall journey. I want to give you a high-level view of my workflow first. We’ll dive into the granular details and prompts later. But you need to see the big picture before we start coding.
Review the workflow
Here are the exact steps I followed to bring Stanza to life:

Draft the requirements with Gemini (45 min). I started by talking extensively with Gemini. I explained my vision for a minimalist, ephemeral Hacker News for books. We brainstormed and debated the features for a while. It eventually spat out a complete feature document. I exported this directly to Google Docs.
Generate a prototype in Google AI Studio (30 min). I took that generated document and fed it straight into Google AI Studio. It gave me a working visual prototype right in the browser. I downloaded the code folder to my local machine.
Save the code with GitHub Desktop (15 min). I opened that downloaded folder in Cursor. I immediately published it to GitHub using the GitHub Desktop app. This created my initial baseline checkpoint.
Build the core app with Cursor (45 min). I then asked Cursor to fill in all the missing pieces. I needed it to turn a basic UI prototype into a fully functioning product. I regularly published my progress to GitHub as Cursor wrote the new code.
Configure the backend with Supabase (30 min). Cursor gave me exact, step-by-step instructions for my database. I followed them to set up Supabase. This handled both my data storage and the magic link authentication.
Test the app locally (30 min). I recommend testing locally at this stage. I tried it, but it mysteriously failed on my machine this time around. I didn’t want to lose momentum, so I pushed through and moved straight to live testing instead.
Deploy the website on Vercel and iterate with Cursor (1h 45m). Cursor told me how to deploy everything on Vercel. Once deployed, I tested the live site. I asked Cursor to fix a few bugs and make some UI adjustments. Every time Cursor pushed a fix to GitHub, Vercel updated the live site automatically.
Review the tools
You might be asking a very legitimate question right now. Why not just do everything inside Cursor? It’s a completely fair point. Cursor is powerful and has access to all the top models. I even tried doing it that way at first. But two major issues stopped me:
First, every single prompt in Cursor costs money. Those cents add up very quickly. I prefer to save my paid credits for the heavy lifting. I use Cursor strictly for complex coding tasks that other tools can’t do. Gemini and Google AI Studio let me brainstorm and generate prototypes for hours for basically free. Iterating in Cursor has a cost, so spend that budget wisely.
Second, Cursor’s raw output can be slightly disappointing without heavy configuration. Gemini and Google AI Studio are already highly tuned for the general public. They know how to output a good document or prototype out-of-the-box. Cursor is a highly flexible development environment. It requires specific system instructions to output high-quality code exactly the way you want it. You can build these rules yourself or find them on open-source GitHub repos. I just haven’t taken the time to set them up yet.
This multi-tool workflow might seem a bit fragmented and manual. I actually prefer it this way for now. It keeps every step visible and tangible. You physically feel the product taking shape. I still manually click the buttons in GitHub Desktop to push my code. You can definitely automate all of this if you want to. You can use the terminal or just tell the Cursor agent to handle the GitHub commits for you.
The same goes for connecting Vercel and Supabase. I know new Model Context Protocol (MCP) integrations exist now. They can automate these tool connections completely. I plan to use them next time instead of clicking through manual setup screens. That will probably cut my build time from five hours down to two. But for your first few projects, feeling those manual clicks is a great way to learn how the pieces fit together.
I used my personal favorite tools for this build, but you are completely free to choose your own stack. If you prefer another LLM, you can easily draft your PRD with ChatGPT or Claude instead of Gemini. Instead of Google AI Studio, you can generate your initial visual prototype using Lovable, Bolt, v0, or Replit. If you don't want to use Cursor, you can write the logic using VS Code with GitHub Copilot or run Claude Code directly in your terminal or favorite IDE. You can also swap Supabase and Vercel for any other database and hosting platforms you already know. The exact tools don’t matter. The execution process remains the same.
Adopt the right mindset
Before we walk through the step-by-step execution, we need to talk about mindset. I have a few golden rules I keep in mind when I build. These principles keep me sane when things get messy.
Build a plan for everything
I don’t just use Gemini to write docs. I use it to generate step-by-step plans for literally everything. If I hit a bug, I ask for a recovery plan. If I need to define a product feature, I ask for a drafting plan. This is actually how I learn new concepts. I explain my exact situation and say, “Write me a plan to solve this, assuming I’m a beginner.” Every time I finish a step, I feed it a screenshot of the result. For example, when my local testing failed on this project, I just fed the error log to Gemini and got a clear checklist to bypass localhost and move straight to Vercel. Always ask your LLM tool for a plan.
Push through every error
You have to be incredibly stubborn. So many people hit their first red error message and just freeze. They act like it’s an insurmountable wall. Let’s be real for a second. We’re just clicking a mouse and tapping a keyboard. We aren’t building a rocket ship or doing grueling factory work. During the Stanza build, the magic link authentication kept failing with a nasty network error on the live site. I didn’t quit. I just kept taking screenshots of the logs and feeding them back to Gemini and Cursor until we found the fix. Everything is fixable, so don’t quit at the first error.
Keep the features minimal
Reduce your scope as much as humanly possible. This rule hasn’t changed with AI. If anything, it’s more important now. When you vibe code, the gap between having a random idea and seeing it work on your screen is incredibly short. The AI makes you feel powerful. You will be strongly tempted to add just one more feature simply because it is so easy to generate the code. Resist that urge.
I always keep a simple math equation in my head. One single business rule turns into ten test cases. Those ten test cases turn into a hundred potential bugs. And those bugs turn into a thousand headaches to fix later. That’s exactly why Stanza is so basic. I stripped out user profiles, complex comment threading, and permanent archives. Posts just delete themselves after 24 hours. Complexity scales exponentially, so only build what is absolutely essential.
Push back on complex solutions
Complexity doesn’t just come from our own temptations to build more. It also comes directly from the machine. AI is incredibly helpful, but it can also overcomplicate things. It sometimes invents complex problems out of thin air. If an AI suggests a solution that feels overly complex, push back. Just reply, “This feels too complicated, is there a simpler, native way to do this?” For example, Cursor unilaterally decided to install a third-party tool called Resend to handle Stanza’s emails. It was overkill and broke the login flow. I pushed back, told it to rip out all the Resend code, and forced it to use Supabase’s native email system instead. You are still the boss. The AI works for you. Never blindly trust the first output without questioning its simplicity.
Organize your digital environment
You have to be rigorous with your workspace. I sometimes help colleagues debug their projects. They share their screen, and it’s an absolute nightmare. They have fifty tabs open and thirty apps running. Their project files are scattered randomly across their Downloads, Desktop, and Documents folders. It’s pure chaos. You get completely lost when you try to debug in that mess. I’m not against multitasking, but you need boundaries. Keep one clean window for your development in Cursor, and one window for your Gemini conversation. That’s it. If you lack discipline, you’ll end up pushing empty folders to GitHub because you clicked the wrong window.
Go through the steps
Let’s dive into the details of how to execute each step from start to finish.
Step 1: Draft the requirements with Gemini (45 min)
The very first step is just talking to Gemini about your idea. You decide how much control you want here. Some people dump a massive export of customer complaints and ask the AI to solve them. Others upload a screenshot of a competitor’s app and say “specify this.” I prefer to treat Gemini like a product manager. I sit down and have a real conversation. I pitch my raw ideas. I ask for feedback. I highly recommend using the microphone for this. Talking out loud gives you total freedom of thought while you speak.
I want to show you the exact prompts I used to build Stanza. It shows how real the process actually is. I started with a very simple question to set the baseline context:
Can you explain how Hacker News works?
Gemini gave me a great breakdown of the platform. It explained the ranking algorithm, the karma system, and the text-heavy minimalist design. It set the perfect foundation for my next prompt.
Then, I pitched my big twist. I just brain-dumped my entire vision in a very conversational way:
I’d like to build a similar website for people who read books and want to share their thoughts. I like the minimalist design, but not like the 2000s. Hacker News feels like it was developed by a geek in his room. I want something minimalist but highly polished. I want a single main feed with no categories. Posts should be simple: just a title and a description. People can read the feed without logging in. They can upvote posts they resonate with without an account. But to publish a post or comment, they need to log in with an email address. I want each post to have a strict life duration of 24 hours before it disappears forever. It should feel like an ephemeral discussion in a book club over a glass of wine. We don’t take our words as immovable. What do you think about this project?
Gemini loved the concept. It called it the pop-up book club. It highlighted the brilliance of the 24-hour urgency. I know Gemini is always enthusiastic and motivating. You should never take its validation for granted. If I needed real validation, I would never ask an LLM. They are just too nice and biased. I didn’t actually need validation anyway. I was already a huge fan of my own idea. This whole process is just about figuring out if the execution makes sense.
But Gemini did help me think about a lot of improvements and ideas. I dismissed almost all of them. However, it pointed out a massive flaw in my logic. It warned me that unlogged voting would lead to massive spam. It suggested using browser fingerprinting to limit votes. That was the only idea I decided to keep from our conversation. This back-and-forth is where the real magic happens.
I agreed with its feedback and pushed for a formal document.
OK, let’s keep it to zero categories to start. I agree with the 1-vote-per-device system. Let’s also limit posts to a single image. It’s just for people who want to snap a photo of a book page instead of typing a quote. Based on all that, can you write detailed specifications so I can hand it to an experienced developer? Focus purely on the core needs and features. Do not write too much fluff. Be very precise about the functioning.
Gemini generated a focused product requirements document. It outlined the core features, the interaction rules, and the strict 24-hour deletion logic.
I needed this document in a clean format to iterate on it.
Can you please put this last response into a Canvas so we can iterate on it? Also please drop the sections about technical stacks and developer deliverables. For the UI/UX notes, add examples of well-known apps for visual inspiration.
Gemini immediately opened a Canvas with the refined text. This interface makes it incredibly easy to edit specific sections without losing the overall formatting. When you get the text in the Canvas, you can highlight specific parts and give direct feedback to Gemini. It’s extremely helpful to get iterations and improve the document right there before you export it.

While we were at it, I needed a good name.
Suggest 10 names for this app.
It gave me some fantastic options based on books and impermanence. The list included names like Vignette, Margin, and Flyleaf. Number nine on the list was Stanza. It hit the nail on the head perfectly.
Finally, I exported the finished Canvas directly into a Google Doc. This Google Doc became the initial source of truth for the project. But this is still just a first version. After some more iterations and discussions, I will ask Gemini to update it to get the v2. That v2 is what I will actually share in Cursor later.

You can read the document here.
We now had a concrete, actionable blueprint ready for the prototyping phase.
Step 2: Generate a prototype in Google AI Studio (30 min)
Now that we have the v1 PRD saved in Google Drive, it’s time to actually build the first visual draft. I don’t write a single line of code for this. I just open Google AI Studio and navigate straight to the Build section.
I keep the instructions almost insultingly simple here. I attached the Google Doc PRD and typed exactly three words.
Build this app.


Here is a secret for vibe-coding. You have to treat the first generation like rolling dice. Don’t just accept the very first output. I actually ran this exact same prompt with the exact same document three separate times. I wanted to see how the AI interpreted the vibe differently each time. Look at the difference below. Both came from the exact same instructions, but one is clearly better. I picked the version in the second image because it gave me an immediate “coup de cœur.”


But having good bones doesn’t mean it’s finished. It still looked a bit like a wireframe. This is where the most powerful workflow loop happens. I started playing ping-pong between Google AI Studio and Gemini. I took a screenshot of the raw AI Studio prototype. I went back to my ongoing Gemini conversation, pasted the image, and asked my AI product manager to tear it apart.
I have a first version. Give feedback about the UI of this modal so that the system can improve it.
The feedback I got back was absolutely incredible. If you aren’t a trained UI/UX designer, this step is pure gold. Gemini immediately noticed that my text inputs had dark grey backgrounds. It told me this created a black hole in the UI that looked like a developer console instead of a book app. It told me to strip away the borders, drop the explicit “Title” labels, and use massive Serif fonts so the typography becomes the interface. It literally told me to transform the modal from a tax form into a blank sheet of paper.
Here is my favorite piece of feedback it gave me:
The “Publish” button looks like a light grey pill. It feels passive. Make the button Solid Black (#000000) with White Text. This creates a strong “ink on paper” contrast that aligns with the Stanza brand.
It also completely nailed the core mechanic of the app. It noticed the “24H LEFT” timer was blending in with the author’s name. It suggested adding a color heartbeat. If a post has less than 4 hours left, the text should turn a muted burnt orange. It wasn’t just fixing CSS: it was improving the product psychology.
At the end of every critique, Gemini conveniently generated a “summary directive for the developer.” It summarized all the visual changes into one dense paragraph. I just copied that directive, flipped back over to Google AI Studio, pasted it into the chat, and hit enter. Google AI Studio applied Gemini’s design feedback to the code. I didn’t touch a single CSS file myself. I was just passing notes between the designer and the developer.
I repeated this screenshot-and-paste loop a few times. You can see the exact visual progression below. Watch how the interface evolves from a clunky pop-up into a distraction-free, full-page literary salon:


I kept iterating until the prototype looked exactly the way I wanted on my screen. I tested the clicks. I checked the layout. And the absolute best part? All of this endless iteration in Google AI Studio is completely free.
Once I was completely satisfied with the visual shell, I clicked the download button in Google AI Studio:

It gave me a neat little zip folder with all the source code. I extracted that code and dropped it into a dedicated project folder on my computer:

The visual foundation was officially done. Now it was time to bring in the heavy machinery to make it actually work.
Step 3: Save the code to GitHub (15 min)
I finally have my prototype code ready to go. I open up Cursor. I use it to open the exact folder I just downloaded from Google AI Studio. This is a big moment for the project. This is where the actual finalization phase begins. The visual shell is completely done. Now we need to connect the plumbing and build the actual engine.

But before I write a single new line of code, I stop. I need to create a baseline save state. I immediately push this initial code to GitHub to create my first checkpoint. I personally use the GitHub Desktop app for this step. I like having a clear, visual interface for my commits. You absolutely don’t have to do it this way. You can use standard terminal commands directly inside Cursor. You can even just ask the Cursor AI agent to handle the commit for you. Just pick whatever method feels the most comfortable.

I hit the publish button in the desktop app. A small modal pops up to confirm the repository name and description. I fill in the details and hit the final blue publish button. Then, I always open my browser and go straight to the GitHub website to double-check. I want to see that my first commit is safely logged in their system. It gives me peace of mind before I start breaking things in the editor.


There is one quick detail to check while you are on the website. Sometimes you click through the setup screens too fast. You might accidentally leave the repository set to private. I always prefer to build these kinds of projects in public. If you made that mistake, don’t worry about it. Just go into the settings tab and scroll down to the danger zone. You can easily switch the repository visibility to public right there.

We now have a solid, backed-up foundation. We are officially ready to start coding.
Step 4: Build the core app with Cursor (45 min)
We are finally back in Cursor. We have our visual prototype, but it doesn’t actually do anything yet. It’s time to build the engine.
I always start by bringing my specifications directly into the codebase. I create a simple folder named docs in the project directory:

Then, I go back to the final Google Doc PRD. Google Docs has a native option to download the file directly as Markdown (.md):

I just download that file and drop it right into the docs folder:

If you discussed improvements and received feedback from Gemini earlier, ask it for a second version of your document so you have the latest specifications. This keeps your absolute source of truth right inside your code environment.
Let me share a quick pro-tip here. Raw markdown files can be really ugly to read in a code editor. If you right-click the file tab in Cursor, you can select “Open Preview:”

It instantly formats the text into a beautiful, readable page. It looks exactly like a clean Confluence document:

Now it’s time for the very first prompt. I open a new chat in Cursor. This is where you absolutely need to understand Cursor’s different modes. If you don’t understand these, you will burn through your paid credits fast. Here is a quick breakdown of how they work and when to use them.

Agent mode: This is the default. It’s fully autonomous. It writes files, runs terminal commands, and edits code immediately. If you ask, “What’s the weather in Paris?”, it won’t just tell you the temperature. It will try to build a fully functioning weather app in your project folder. Use it for quick, clear tasks where you know exactly what needs to be built.
Plan mode: This mode forces the AI to think before it acts. It researches your codebase, asks clarifying questions, and writes a step-by-step roadmap for you to approve. If you ask about the weather, it will pause and ask: “Are we building a CLI tool or a web dashboard? Do you have an API key?” This is my absolute favorite. Use it by default for any multi-step feature to prevent Cursor from going rogue.
Ask mode: This is a strict read-only mode. It reads your code and answers questions, but it cannot write or edit files. If you ask about the weather, it simply replies, “It is 15°C in Paris.” Use it when exploring unfamiliar code or when you just need a simple explanation without risking accidental changes.
Debug mode: This is a specialized mode for tricky errors. Instead of blindly guessing, it instruments your code with temporary logs, asks you to reproduce the bug, and analyzes the real runtime data. If you ask about the weather, it says, “I can’t get the data. Let me add console logs to your API call so I can see where it fails.” Use it when your app crashes or when Agent mode is stuck in a loop.
I set the model to Claude 4.5 Sonnet because its coding results are incredibly reliable. I select Plan mode and type a very direct prompt:
Finalize this app so that I can release it into production.

Because I used Plan mode, Cursor didn’t just start blindly coding. It paused and asked me a series of multiple-choice questions to define the architecture. It literally gave me a guided quiz to figure out exactly what tools I wanted to use. This is incredibly helpful if you aren’t sure where to start. Here is how I answered its questions to guide my setup:
Question 1: What backend implementation do you need for production? I selected option A: “Full backend with database, authentication, and email service - real production app”. I didn’t want a fake static demo. I wanted the real deal.

The AI agent asks a multiple-choice question about the backend architecture Question 2: What hosting/deployment platform do you prefer? I selected option A: “Vercel”. It’s natively recommended for React apps and is incredibly easy to use.

I select Vercel as the hosting platform in the chat questionnaire Question 3: Which database would you like to use? I selected option B: “Supabase (PostgreSQL with auth helpers)”. Supabase is fantastic for handling both data and magic-link logins in one place.

I choose Supabase as the project database in the chat options Question 4: What email service do you want to use? Cursor suggested tools like Resend and SendGrid. I explicitly chose option F: “No emails are sent to users, except for the one to log in”. Always restrict the AI when you can to avoid unnecessary complexity (I will explain the specific deployment issue this caused later on).

I instruct the AI agent to skip third-party email services Question 5: Do you already have API keys for these services? I selected option B: “No, help me set up new accounts”. This tells the AI to generate instructions for me later.

I ask the AI agent to help set up new API keys


Based on my answers, Cursor generated a massive, 16-step execution plan. It created a markdown file with a full architecture overview and a checklist. It’s honestly a bit exhausting to look at, even though I’ve done this multiple times. I quickly reviewed its logic to make sure it understood the assignment.


Once I was happy with the roadmap, I clicked the yellow “Build” button. This is the magical moment. Cursor automatically switches into Agent mode and starts rolling through the checklist. You can literally watch it check off the to-dos one by one as it creates the backend endpoints.

But you can’t just walk away and grab a coffee. You have to supervise it. The Agent will regularly pause and block the process when it edits core files. It shows you a clean visual diff of the code changes. You have to manually hit the “Accept” button to let it continue.

When Cursor finally finished the entire 16-step plan, it dropped a big “Ready to Deploy!” message in the chat.

More importantly, it automatically generated a few new Markdown files in my project, including one called NEXT_STEPS.md.

I opened that file in preview mode. It gave me a beautiful, human-readable summary of the 1,500 lines of code it just wrote. It also gave me exact, step-by-step instructions on what I needed to click inside Supabase to get the database running. These are the exact guides I followed to finish the backend integration.
Step 5: Configure the backend with Supabase (30 min)
We have our code, and we have our exact NEXT_STEPS.md guide generated by Cursor. Now we just need to execute the plan.
The first major task is setting up the database. I head straight over to the Supabase website. They promise you can “Build in a weekend, Scale to millions” right on the homepage. That’s exactly the vibe we are going for here.

I log into my free account and click the big green “New project” button.

A simple setup screen appears.

I name the project “stanza”, select my region, and generate a strong database password. You just hit create and wait a minute or two for the servers to provision. It’s literally that easy to spin up a production database today.
Once the project is active, I need to link it to my code. I navigate to the Project Settings and open the API section. I’m looking for three specific things here: the Project URL, the anon public key, and the service_role key.

I copy these raw values. I jump back into Cursor. I open the .env.local file that Cursor created for me earlier. I paste those Supabase keys directly into the file. This is the critical bridge. This file tells my local code exactly how to talk to my live database.

Let me stop here and share a crucial security rule. You must never push these secret keys to GitHub. If you expose your database keys publicly, malicious bots will scrape them and ruin your app. Cursor already handled this for me technically. It automatically added .env.local to a hidden file called .gitignore. That file tells GitHub to completely ignore the secret keys when you upload your code.
Now we need to actually build the tables to hold our data. Remember that 16-step plan Cursor ran through earlier? One of those steps was generating a massive schema.sql file. This file contains all the database rules and structures we need. I open schema.sql in Cursor and copy every single line of code.

I go back to my Supabase dashboard and open the SQL Editor. I paste the massive block of code into the blank query window and hit “Run”. For this specific project, it worked perfectly on the very first try. I immediately got a clean “Success. No rows returned” message.

Don’t panic if you get a red error message here. It happens sometimes with AI-generated SQL. If it fails, you don’t need to learn database administration to fix it. Just copy the exact error message from Supabase, paste it back into your Cursor chat, and tell the AI to generate a new schema. It will fix its own mistakes.
Because it worked perfectly, I wanted to see the result visually. I clicked over to the Schema Visualizer in Supabase. Supabase successfully created and linked five distinct tables: users, posts, comments, votes, and magic_links. The entire backend architecture is fully alive.

There was just one final tiny step in the guide. Since Stanza allows users to upload a single photo per post, I needed a place to store those image files. I went to the Storage tab in Supabase and clicked “New bucket”.

A modal popped up to configure it.

I named the bucket post-images exactly as the guide instructed. More importantly, I toggled the “Public bucket” setting to ON. If you forget this toggle, your app will upload images perfectly fine, but nobody will actually be able to see them on the feed. Once created, you get a clean, empty folder view ready for uploads.

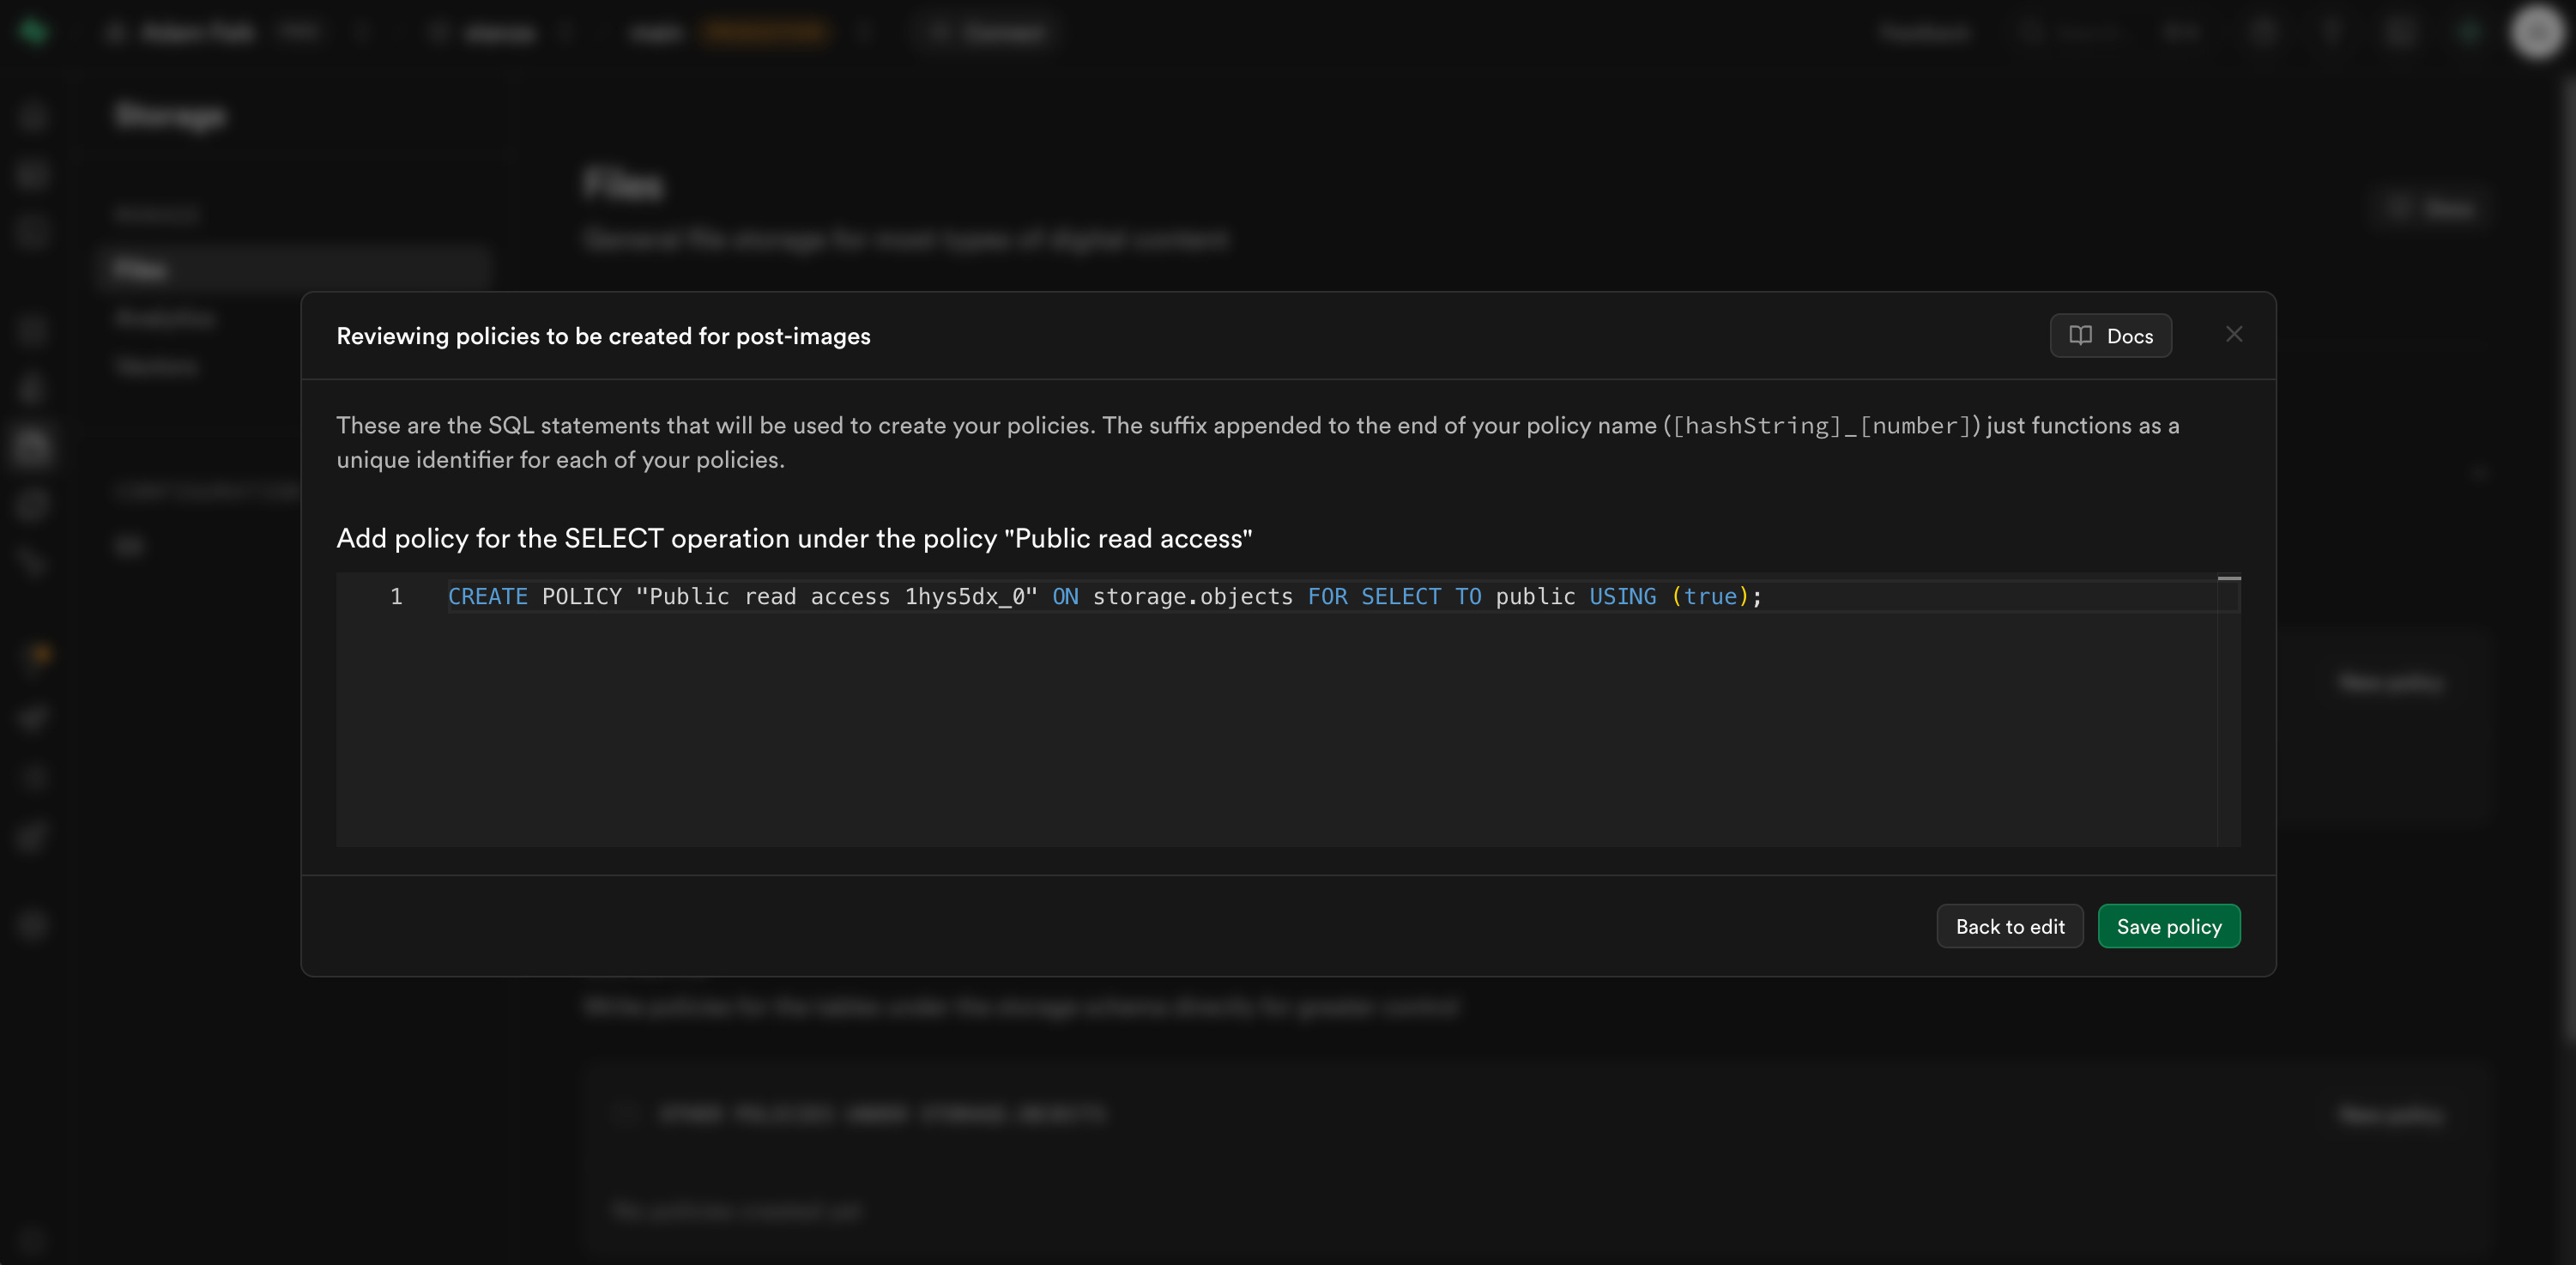
But there’s a little trap here that catches a lot of beginners. Even though the bucket is public, Supabase still requires you to explicitly define security policies. I went into the bucket policies and added a new one called “Public read access”. I checked the box for the “SELECT” operation and set the policy definition simply to true. This tells the database that literally anyone is allowed to view the files inside.

Supabase shows you a quick summary screen to review the exact SQL statement it’s about to run for this policy. I clicked “Save policy” and the storage setup was officially complete.
The database, the authentication, and the file storage were fully wired up.
I know all of this database terminology might sound incredibly complicated if you have never set up a backend before. But I promise you, I didn’t invent a single thing here. I just followed the exact step-by-step recipe that Cursor wrote for me in that NEXT_STEPS.md file. You literally just click where Cursor tells you to click.
Step 6: Test the application locally (30 min)
Normally, once the .env.local file is filled with Supabase keys, I test everything locally. I always prefer to hunt down bugs on my own machine before deploying anything live. According to the trusty NEXT_STEPS.md guide, the next move is simply to start the development server. So I opened the terminal in Cursor, ran npm install, and started it up.

I want to share a really cool trick here. You don’t actually need to open Chrome to test your app. Cursor has a built-in browser tab. Just prompt @browser go to localhost:3000 to launch it directly inside the editor.

The Stanza homepage loaded perfectly. It’s rewarding to see your code come to life in the exact same window. But then I tried to actually use it. I clicked log in, entered my email, hit continue, and immediately got slapped with a red “Network error”.

I didn’t panic. I used one of Cursor’s best debugging features instead. When you use the internal browser, you can click the three little dots in the top right corner. You can instantly take a screenshot of the app and attach it directly to your prompt.

Even better, if you are in Agent mode, Cursor can actually take control. It can click the buttons itself, read the browser console, and pull the exact error logs automatically. It’s a way to save time.
I fed the error screenshot to the prompt. Cursor told me the authentication flow was failing because it was trying to connect to both Supabase and that completely unnecessary Resend email service.

I iterated. I insisted. I asked for fixes. I spent way too much time trying to resolve this network error locally. Nothing worked. Usually, I spend a solid hour here polishing the app and clicking every button before putting it on the internet.
But you know what? Sometimes you just have to keep moving forward. It wasn’t that big of a deal. I decided to stop fighting my local environment. I did a quick file cleanup to move all the messy markdown files into a docs/guides folder.

Then, I pushed the whole project to GitHub. I decided to deploy it to Vercel and fix the bugs live in production instead.
Step 7: Deploy the website on Vercel and iterate (1h 45m)
I opened GitHub Desktop and pushed my latest commits to my main branch.

It feels great to see those files safely backed up online.

Now it was time to make the app public. I opened Vercel in my browser.

Cursor’s NEXT_STEPS.md told me exactly what to do here. I clicked “Add New Project” and imported my Stanza repository directly from GitHub. Vercel is incredibly helpful. It automatically detected that my app was built with Vite and pre-filled all the correct build settings. I literally just clicked the “Deploy” button.

A few seconds later, Vercel showed me a success screen.

But don’t celebrate just yet. There is a massive trap here that catches almost every single beginner. If you open your live URL right now, you’ll probably just stare at a blank white screen.
Cursor actually warned me about this exact issue in the deployment guide. Your local code knows how to talk to Supabase because of your secret .env.local file. But remember, we explicitly told GitHub to ignore that file for security reasons. This means Vercel doesn’t have your database keys. You have to manually add them.
I navigated to the Project Settings in Vercel and opened the “Environment Variables” tab. It was completely empty.
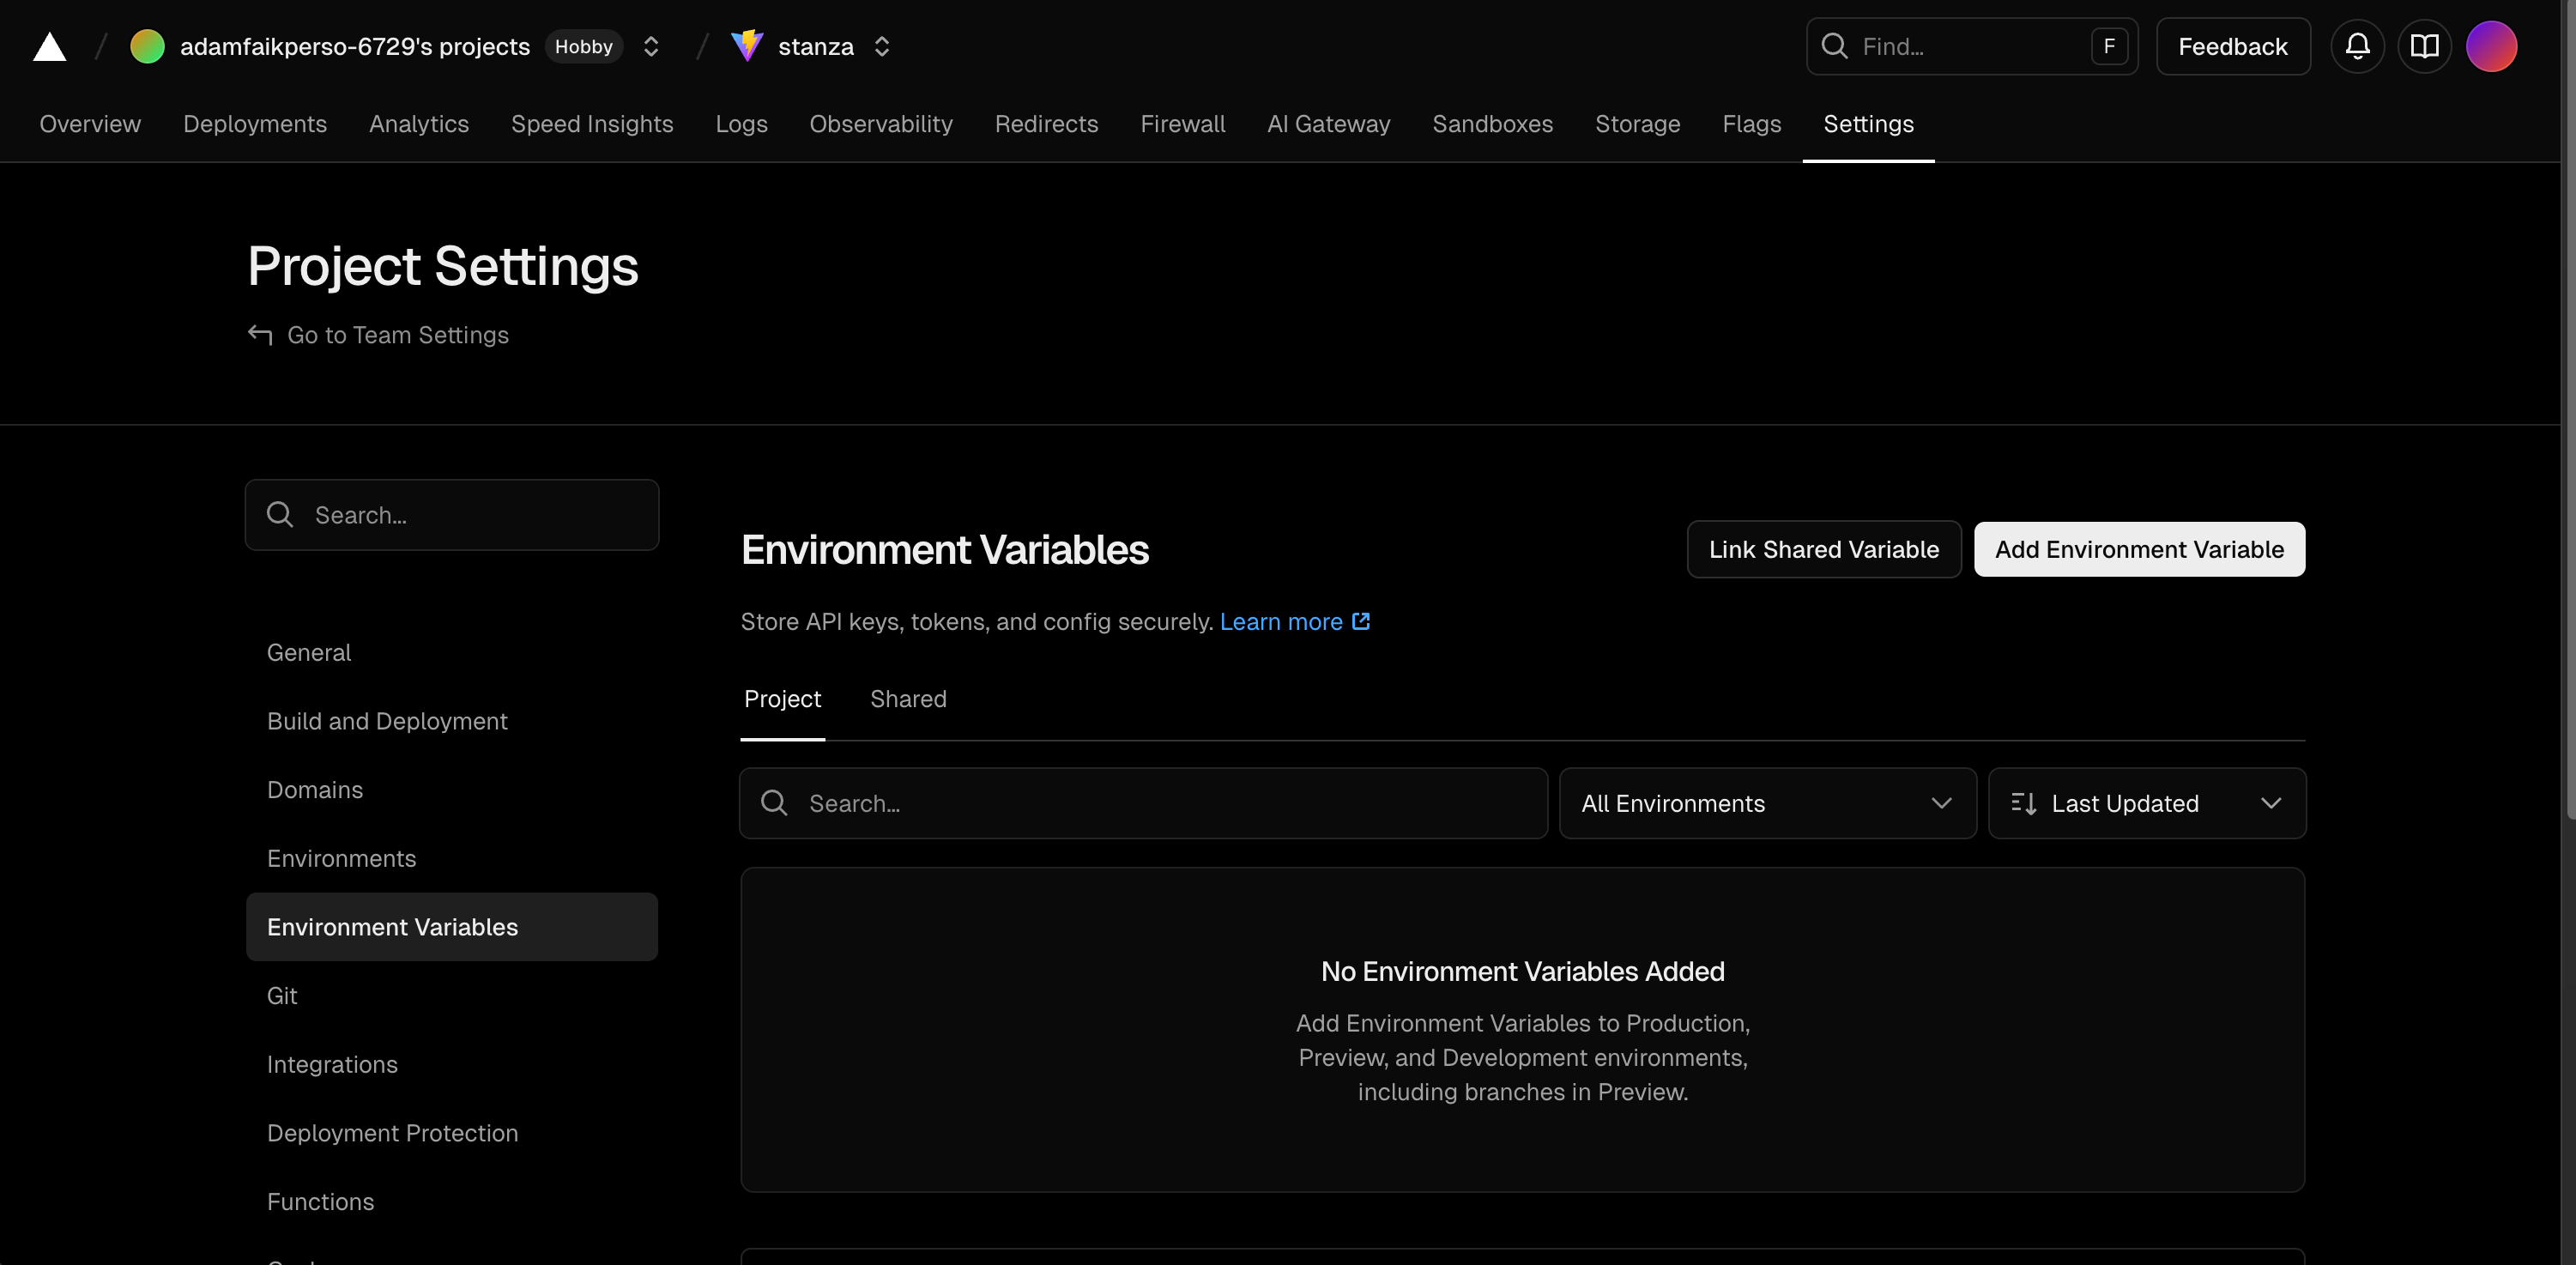
I copy-pasted my Supabase URL and keys directly into the dashboard. Always remember to copy your environment variables to your hosting provider.

Because I added those keys after the initial deployment, Vercel didn’t apply them yet. I had to trigger a quick redeploy.

This tells Vercel to rebuild the app from scratch using the new database credentials. I watched the build run one more time. It only took about 2 minutes.

There was just one final piece of plumbing to connect. The NEXT_STEPS.md guide reminded me to configure my auth redirects. Supabase needs to know where to send users after they click a magic login link in their email. I copied my shiny new Vercel URL, went back into the Supabase Authentication settings, and pasted it into the Redirect URLs field.
I opened my live link in a new tab. It loaded instantly. The blank white screen was gone. The beautiful, minimalist interface was officially live on the internet!

The engine was finally running in production.
Debug and polish the project
Telling the story this way makes it sound like a perfect, straight line. It absolutely wasn’t. You inevitably hit a wall where the happy path ends. We are now entering the messy middle. This is the phase dedicated entirely to testing, debugging, and pulling your hair out.
Troubleshoot the live product
Right off the bat, my very first Vercel deployment actually failed. The build crashed, and Vercel spit out a red error log about a missing property:

I didn’t panic. I just copied the exact error text, pasted it into Cursor, and let the AI push a quick fix. The deployment succeeded on the second try.
But the real nightmare started when I tried to log in on the live site. I entered my email, clicked continue, and got hit with a brutal “Network error” modal.

Let me tell you exactly what happened here. Back when I was generating the initial architecture plan, I explicitly told Cursor to skip adding any external email services. I wanted to keep things simple. But the AI got a little overzealous. It unilaterally decided to include a third-party tool called Resend in its 16-step to-do list anyway. I wasn’t vigilant enough when I approved the plan. I saw Resend on the list, thought it might be fun to test a new tool, and just let it slide.
That was a massive mistake. The integration was overly complex and completely broke the authentication flow. I wasted way too much time trying to fix it. Eventually, I had to put my foot down. I opened Cursor and explicitly commanded it to rip out every single line of code related to Resend. I forced it to clean up its mess and revert to the native Supabase magic link system. Always trust your gut when an AI solution feels too complicated.
Even after purging Resend, the live login still failed. I needed to see what was actually happening behind the scenes. I went into Vercel and clicked on the “Logs” tab. Sure enough, there was a massive red backend error. The server couldn’t find my Supabase module.

I took a screenshot of the Vercel log and pasted it directly into a new Cursor chat. I made sure to switch back to Plan mode. I didn’t want the AI to guess. I wanted it to diagnose the root cause.

Cursor nailed it instantly. It explained that Vercel serverless functions require explicit file extensions for certain imports. It wrote a clear plan to update the API routes. I clicked “Build” and let it rewrite the broken files.

During this debugging session, Cursor also caught a subtle environment variable bug. Because I was using Vite, my frontend needed the database keys to be prefixed with VITE_ to actually read them. Cursor automatically updated my .env.local files to fix this mapping.

I pushed the code to GitHub, Vercel rebuilt the site automatically, and the network error finally disappeared. The engine was flawlessly humming.
Improve the final experience
With the critical bugs crushed, it was time to polish the experience. Building an app is exactly like building a house. Pouring the foundation and putting up the walls is incredibly fast and highly visible. You know immediately if it worked. But painting the trim, fixing the lighting, and sanding the floors? The tiny details take the majority of the time.
I went back to my very first Gemini conversation. I started feeding it screenshots of the live app. I asked for feedback on the spacing, the typography, and the button contrasts. I took Gemini’s suggestions, fed them to Cursor, and iterated on the UI until it felt like a premium product.
The best part of this setup is the automatic deployment. Every time I push new code to GitHub, Vercel automatically updates the live website. For each tiny adjustment, I just push the changes using GitHub Desktop (or ask the Cursor agent to do it for you). I only have to wait one or two minutes to see the final result in production.
I also wanted every touchpoint to feel branded. The default Supabase magic link email is painfully generic. It looks like a database auto-reply.

I opened Gemini and asked it to act as a frontend developer. I told it to generate a custom HTML email template that matched Stanza’s minimalist, black-and-white, serif aesthetic. It spat out a beautifully formatted block of code.

I just copied that raw HTML, went back into the Supabase Email settings, and pasted it directly into the “Body” field. Now, when a user logs in, they get a sleek, highly polished email inviting them to “enter the room”.

For the absolute final step, I used Gemini to generate some mock data. I asked it for fake book reviews, controversial thoughts, and insightful quotes. I manually populated the live feed with these posts. This gave me a real sense of how the layout handled actual paragraphs and upvote counts. I tweaked the line heights one last time based on this realistic data.
And just like that, at the five-hour mark, Stanza was completely finished.
Build your own idea now!
And there you have it. That’s the entire fever dream from start to finish. Five hours. About €60 in credits. A few frustrating bugs along the way, but we successfully shipped a live, working product.
I really hope this walkthrough proved a point. There has literally never been a better time to build. The barrier to entry for creating software is completely gone. You don’t need a massive budget. You don’t need a team of developers. You don’t even need to know how to write a database schema from scratch. You just need a bit of digital discipline, a lot of stubbornness, and a solid vision.
We all have that one app idea we’ve been sitting on for years. It’s the one you always talk about at the office but never actually start. Maybe it’s a weird niche marketplace. Maybe it’s a tool to fix a highly specific annoyance in your daily workflow. Whatever it is, you have absolutely no excuses left.
Your homework is incredibly simple. I don’t want you to worry about code, databases, or Vercel deployments today. Just open a new chat window with Gemini. Turn on your microphone. Pitch your raw idea out loud, just like you would to a colleague over coffee. Let the AI ask you questions. Once you have that blueprint, the rest of the process is just following a recipe.
The tools are ready. The cost is negligible. Now, close this article, open a chat window, and go build something awesome! I can’t wait to see what you ship.